Setting up IDEs and Git
A video version of these initial tutorials is available here.
Prerequisites
For this guide, you'll need:
- A Micro-USB cable
- A computer with administrator rights (A school Chromebook won't work here)
- Your Raspberry Pi Pico W (which is included in your competition kit)
Installing Thonny
This step and the rest of this guide assume that you are on Windows. If you're on MacOS, you should be able to get the correct versions of both of these apps from their sites. If you're on Linux, you should already know how to do this, and it's exceptionally likely that these packages are available on your preferred application distribution.
- Download the Thonny installer from here and run it.
- Select "Install for all users" and allow the action.
- Accept the license agreement and continue through the rest of the installer, leaving everything at its defaults. Once it completes, select "Finish".
- Make sure your Pi is connected to your computer via the USB cable.
- Open Thonny from your start menu, and accept the default settings.
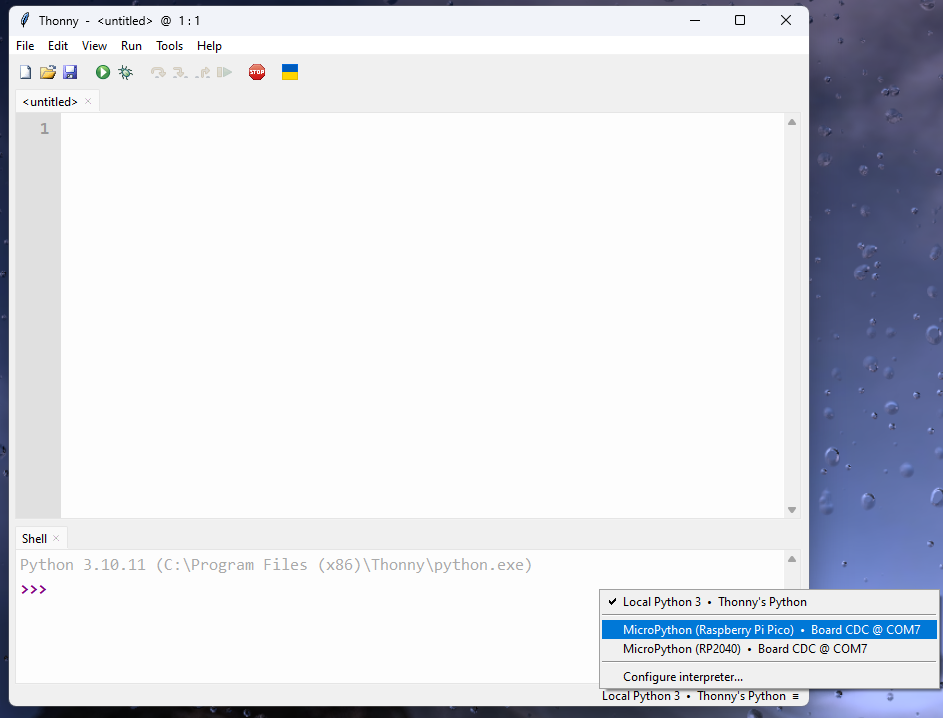
- In the bottom right corner, select
Local Python 3 | Thonny's Pythonand change it toMicroPython (Raspberry Pi Pico).
Installing Git
If you're a winget user, you can run winget install --id Git.Git -e --source winget to skip these steps. If you don't know what winget is, keep reading.
- Download the Git for Windows installer from here, and run it.
- Accept the license, and continue through (accepting the defaults) until you reach the default editor page - select Visual Studio Code from the dropdown.
- Continue onward until you reach "Adjusting your PATH environment" - select "Git from the command line and also 3rd-party software".
- Leave everything else at their defaults, and select "Install".
- After installation, uncheck "View release notes" and select "Finish".
Installing Visual Studio Code
- Download the Visual Studio Code (hereafter referred to as "VSCode") installer from here and run it.
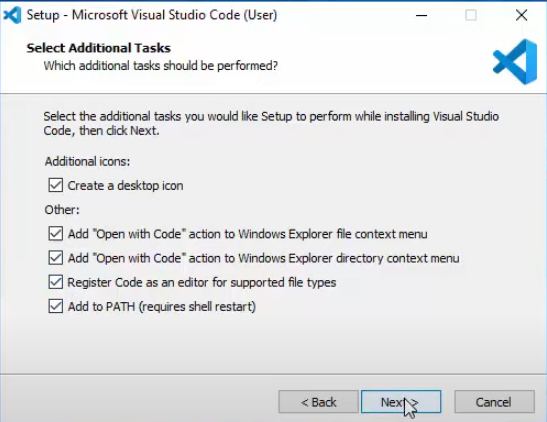
- Accept all the defaults up until the "Additional tasks" page - on this page, select all the options.

- After the installation completes, VSCode should launch.
Further Reading
Before continuing, I reccomend reviewing at least the first two links in this section to get an idea as to what git is and why you should use it.
- https://www.geeksforgeeks.org/what-is-git/
- https://www.youtube.com/watch?v=2ReR1YJrNOM
- https://git-scm.com/book/en/v2/Getting-Started-What-is-Git%3F
- https://projects.raspberrypi.org/en/projects/getting-started-with-the-pico
- https://code.visualstudio.com/docs/introvideos/basics
Now, we're ready to begin setting up our project.